The procedure is straightforward. A Stock Take Date is decided on when the stock take will commence. The items are then scanned one by one, in any order if you wish. This continues until you do all the items in the library, or by a particular Publication type, Collection, or Shelf Range.
Set up the Stock Take Date
In the System Dates change the date to your earliest date when you will commence Stock Taking.
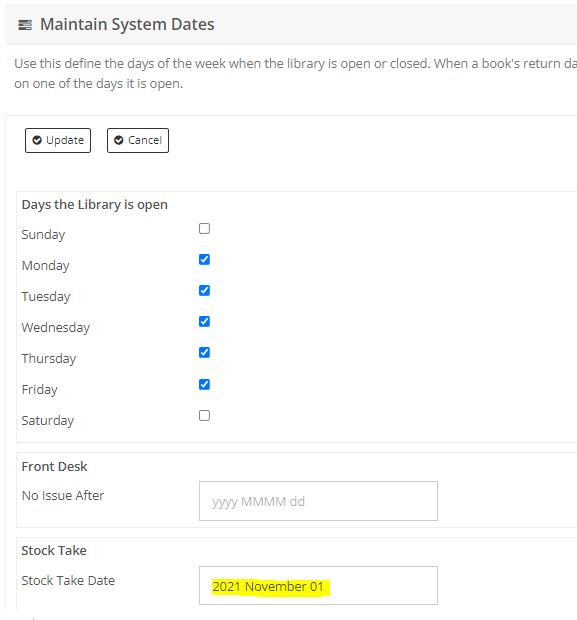
Once you have changed the date, click the Update to save your changes
Stock Take by scanning the stock items
Select the menu option Stock Take
The Stock Take Date will be displayed on the form. The cursor will be in the Accno or Barcode field waiting for you to type or scan in the barcode. When the Enter key is pressed or the scanner completes the scan, the stock item details will be displayed and the item tagged with the stock take date.
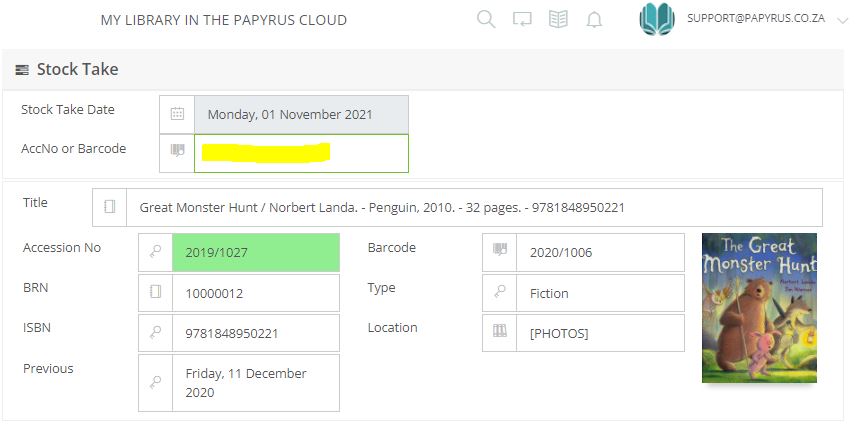
The Previous stock take date will also be shown at the bottom of the form
Repeat the process for each stock item
Stock Take Enquiry
Whilst you are scanning the stock, or when you have completed a section of books, or the whole library, it is now time to see which items have been Scanned or Not Scanned.
Use the menu option Stock Take Enquiry to open the Enquiry page
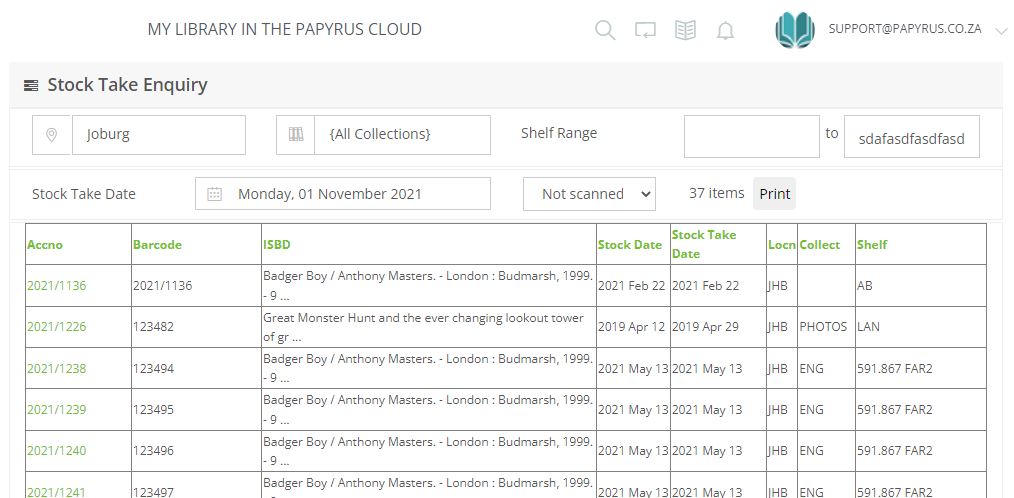
There are three sections to the form. The first gives the ability to select Locations, Collections and a Shelf Range. The second section displays the Stock Take Date and a selection by drop down list of All Stock, or items that either Scanned, Not Scanned, or Issued
- All Stock lists all the stock items in the first section's selections
- Scanned lists all the stock items that were scanned on or after the Stock Take Date
- Not Scanned lists all the stock items that were scanned before the Stock Take Date. These are missing
- Issued Items lists all the stock items are currently in circulation
The selected items can then be printed in a report by clicking the Print button.
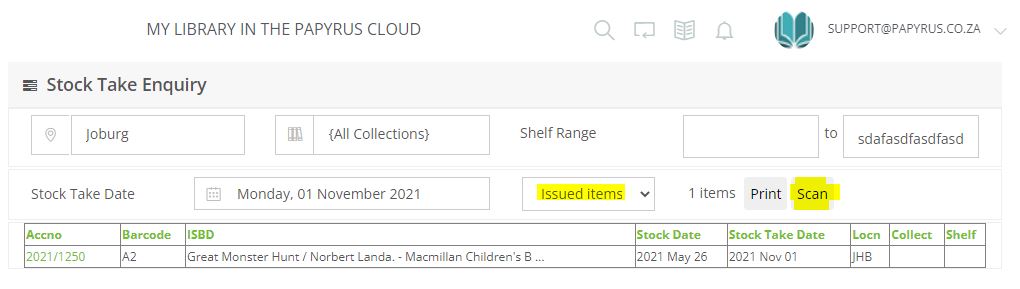
Handling items that are currently issued in circulation
There is no need to return issued items so that you can take stock of them. The library can assume that the stock item exists as it has been loaned to a member and is the member's responsibility. When you select the Issued Items option, a Scan button will appear. You can use this option to mark all the issued items as scanned items. This will remove the need to return the items to take stock of them
Select the Scan button and you will be asked to confirm whether you wish to tag the items with that date.
Completing your stock take
Once you have completed the stock take, you can print the various reports and also select the items that are missing and decide on how you will handle them.
You can either wait until they reappear, or you can select one of the Stock Statuses such as Missing, Lost etc. Selecting the accession number will bring up the stock item in EasyCAT. You can then either change the Stock Status of the item, or you can delete the stock. Deleting the stock will move it to the Deleted Stock Audit Trail
Your Stock Take has now been completed. If you are doing it by location, or collection or shelf range, move onto the next selection.