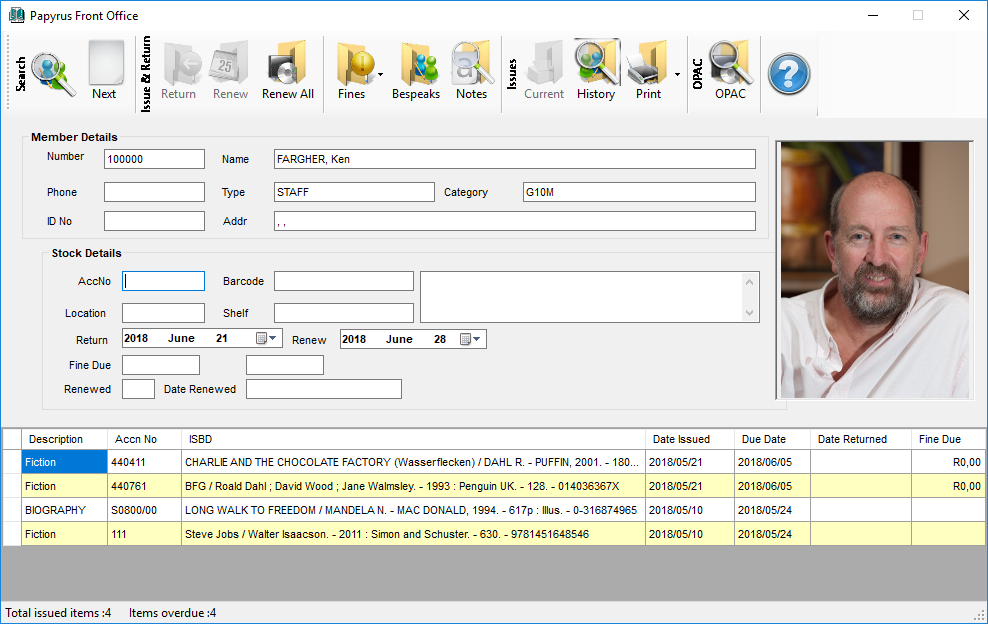
The Front Office manages the circulation of library items to library members. The screen is designed to be quick and efficient. In addition, the screen can be used without a mouse so that handling of books is easier
The system is intuitive in that it knows if a book is on issiue or in the library. It also understands that when returning a book, the library member's details don't have to be entered first.
Issuing a Book
Step 1 - Selecting the Member
Here there are two options.
The first is to type or scan the member number into the Member Details - Number field. You will need to press the Enter or Return key. If you are using a scanner, it should scan the barcode followed by the Enter or Return key if is has been correctly set up

Or you can click the Find Button which will bring up a screen which you can search by name. Any part of the surname or name can be entered; or a Member Type can be selected and an optional Category. There is also an option to toggle the view to see the photographs for identification

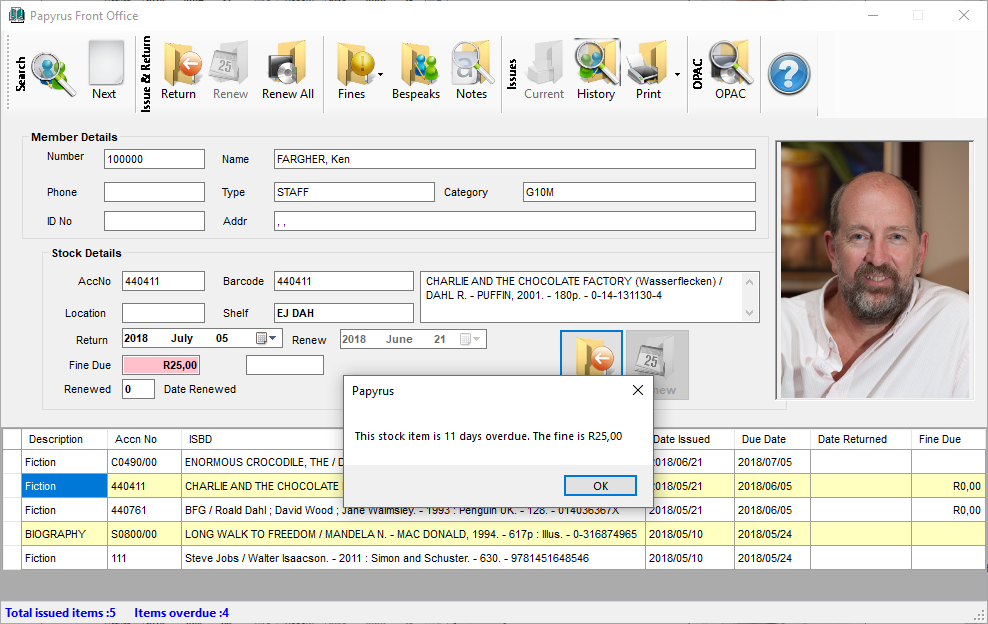
If the member number is correct, the member's details will be displayed and a photograph if captured. A warning message will show if items are overdue. Below, in a grid, issued items are shown. A record of all issues to this member can be displayed using the History button on the tool bar
 Step 2 - Selecting a Book or Stock Item
After scanning in the member, the cursor will waiting in the AccNo or Accession Number field. Type or scan the accession number or barcode of the book. If the barcode is correct the book's details will be displayed. The return date will be displayed based on the privileges of the member
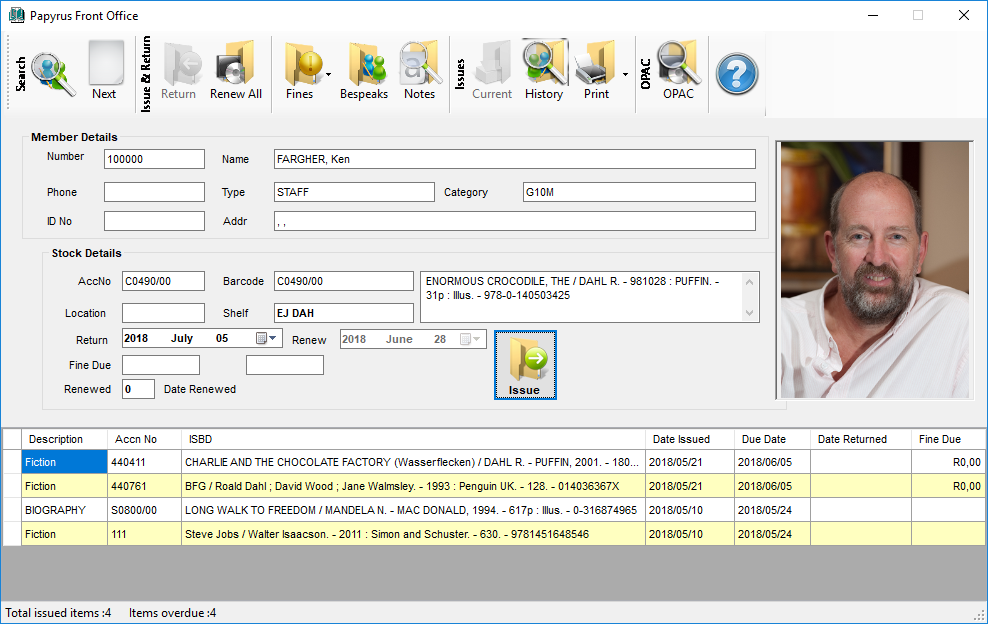
If the item has been issued to another member, a warning will be displayed and thereafter the corrtect member will be displayed
The ISSUE button will have the focus and will be waiting for the Enter or Return key to be pressed
If the book has already been issed, it will focus on the RETURN button.
Step 3 - Confirming the Action
Press the Enter or Return key to ISSUE the book to the Member. The details of the last book issued or returned are at the bottom of the screen
After this, the next Accession Number can be entered. Clicking on the Member Number will clear the selected member and you will return to step 1. Clicking the Accession number, will clear the book and return to waiting for the next accession number
The Short Cut key F2 is provided for selecting the next member
Returning a book
Step 1 - Selecting a Member
If you have already selected a member, the cursor will be waiting at the AccNo. However, if you have not selected a member and they are returning a book, all you need to do is to scan the barcode into the Number field under Members details.
If a Member Number does not match, Papyrus will look for an accession number that matches and if it has been issued it will bring up the corresponding member
The Focus will be on the RETURN button
Step 2 - Returning the Item
Press the Enter or Return key to RETURN the book to the Member. The details of the last book issued or returned are at the bottom of the screen
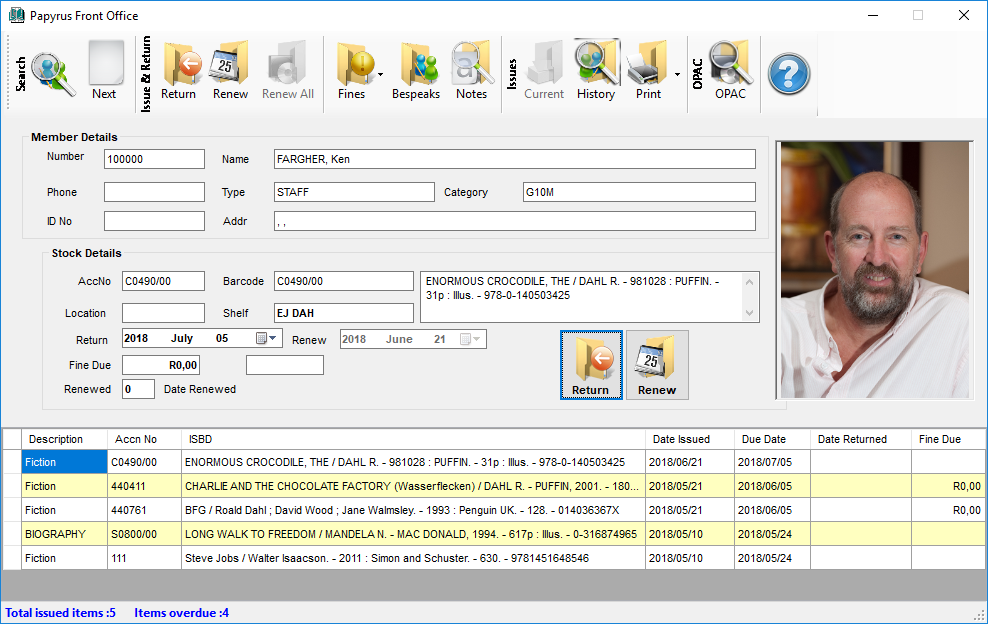
At this point you may also RENEW the book and you will need to make that selection by clicking the TAB key or using the mouse to click it
Fines
Fines can be charged on overdue books.
Calculation Method
The fines are set up in the Privileges section of Management which specified the amount that is charged per set of days. For example, if the fine is R 2.00 and the days is 3, then every 3 days a book is overdue, R 2.00 will be charged.
The days overdue is calculated on the number of days since the book was due, less the grace period and less days when the library was closed of if there were Holidays during that period.
When the bopok is returned, the fine is calculated at that point. Estimates of fines due can be done in Overdue Management
 Paying Fines
Use the Fines button to change the bottom grid to a detail description of the fines due. The Fine Due, Fine Paid and the Fine Waived are displayed
A book's fine must either be paid or left fopr a later stage. If it is paid, it can be fully paid, part of it can be waived or fully waived. This is done by typing in either the amount of the fine or the amount that is waived.
There are three drop down buttons that will apply to all books - PAY ALL, CLEAR ALL and WAIVE ALL. Books that are cleared will be dealt with the next time fines are paid. There is a option to display the total fine and waived amounts.
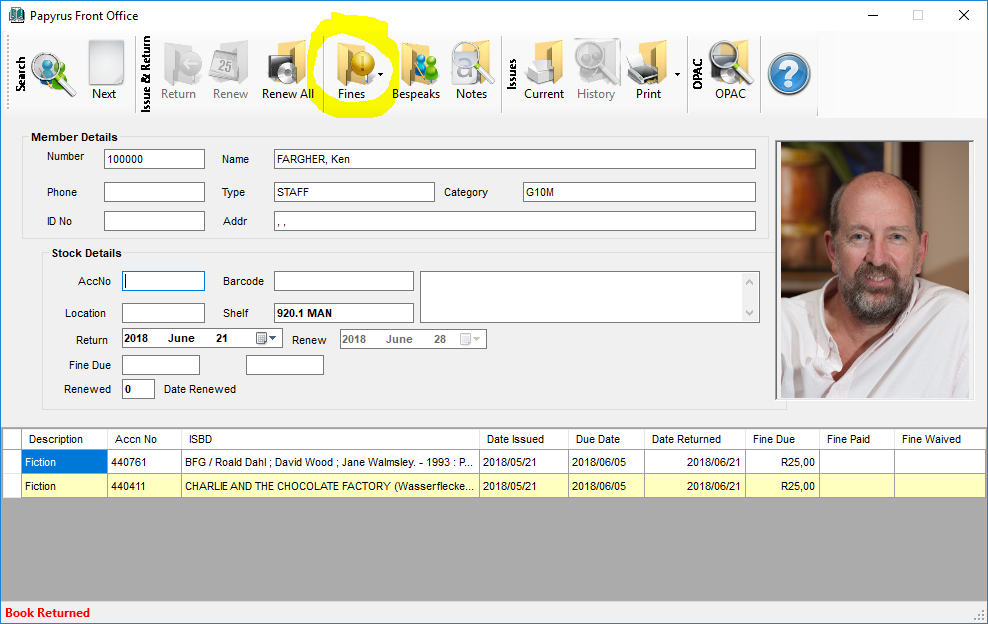
Once the books that are being paid or waived are selected, there are two options to complete the process. The Print Receipt will print a receipt of the fine paid whereas the Just Receipt will only receipt the money. There is a quick option to Pay and Receipt All. The Short cut keys F8 and CTRL-F8 are provided for quick fine paying action.
Notes
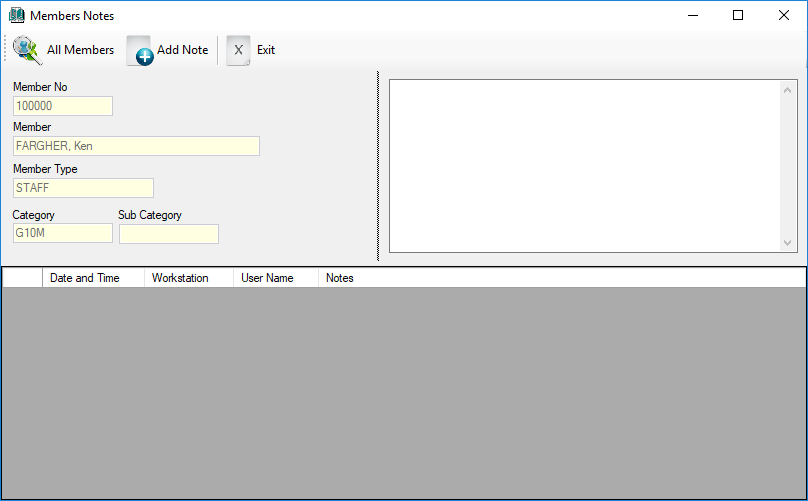
A note can be added to a member's record. It will record the time, the library staff member and the note taken
Bespeaks
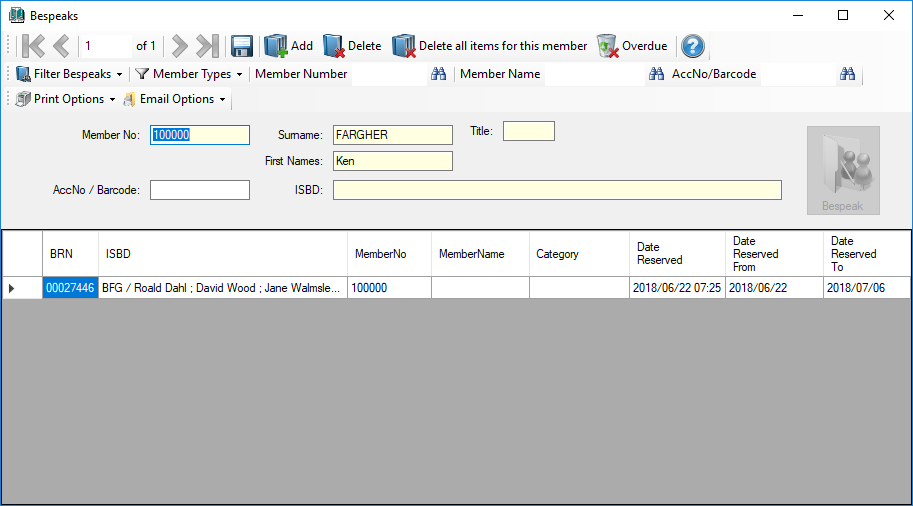
Publications in the library can be Bespoken which means reserving or ordering the item. If, for example, a library member is interested in the book The BFG by Roald Dahl and all copies of it are currently issued, that item can be bespoken by the member for a period of days specified in the Member Types parameters. When one of the copies is returned, the front desk is notified that the item has been bespoken and by whom.
The process of bespeaking a book is simple. Click the BESPEAK button on the tool bar.
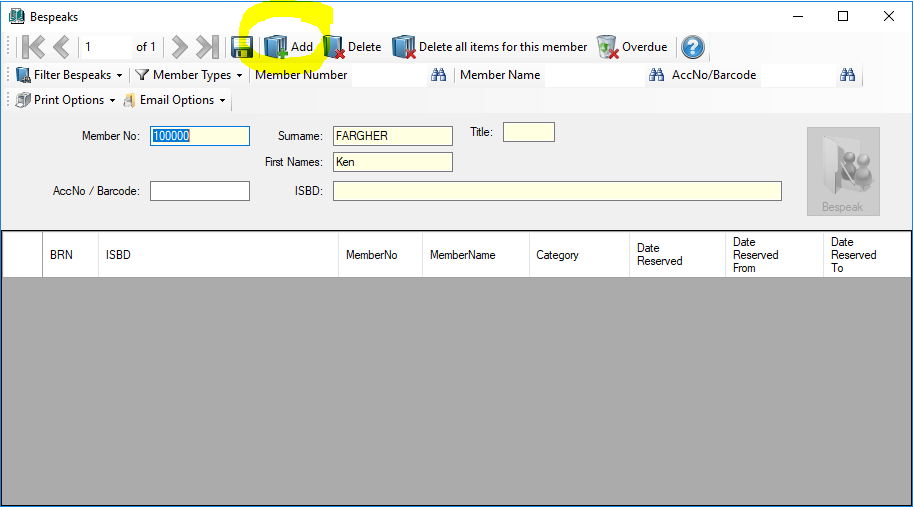
Now search for the book using OPAC. Select the book and it will add the details into the grid below. The date reserved will be recorded and the Date Reserved from and Date Reserved To will be calculated. These can be amended if needed.
