Performing a Stock Take with Papyrus makes your job easy, quick and accurate. The process is involves the following steps:
Setting the Stock Take Date
Decide on a date in the future which will be the Stock Take Date. This is the date which all items that have been tracked are marked as having been found during the stock take. All items not found will have a date prior to this date.
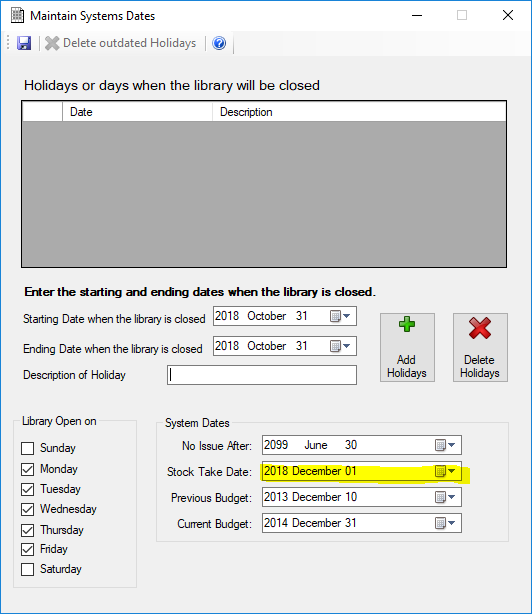
The first thing is to decide on the Stock Take Date. Select Parameters, System Dates from the Menu Bar. On the screen, there is a group box with System Dates. Select the date using the following screen:
Scanning the Stock Items
Decide on an area in the Library that will have a Stock Take. This would involve selecting a Location, a Collection and a range of shelves.
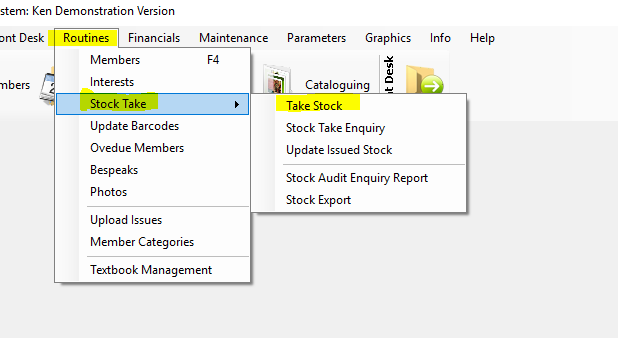
Now select the Routines menu option, then Stock Take option, and the Take Stock item.
Find all books and scan in their barcode. This will mark the item’s Stock Take Date to that of the Stock Take Date in the System Dates.
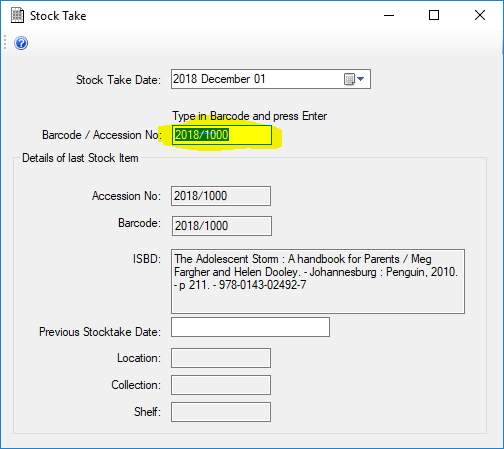
In Stock Take Date field change the date on which Stock Take will end(the same date as you typed into Parameter Maintenance).
Scan or manually enter the Barcode or Accession Number into the Barcode or Accession Number field.
The bibliographic description of the scanned item appears in the ISBD field
This will mark the item as having been Stock Taken.
Select the various prameters and then click the refresh button to display the stock items
Continue with this scanning process until all the relevant items have been entered.
If you do not finish your Stock Take in one day, just enter the same dates the next day as described above and continue scanning.
Using a barcode scanner makes stock taking quick because you just scan the item that then gets automatically sent to the Stock Reports. The stock take date is recorded when you scan your item.
The system will take into account items that have been issued and not returned. When you run the reports, the system will ask you to update the items in circulation. They will be taken stock of at the Stock Take date in the Systems dates (see below).
Print out the missing stock
Print out a report of all items that are missing using the Location, Collection and Shelf Range. Repeat finding the missing books until the stock take is finished.
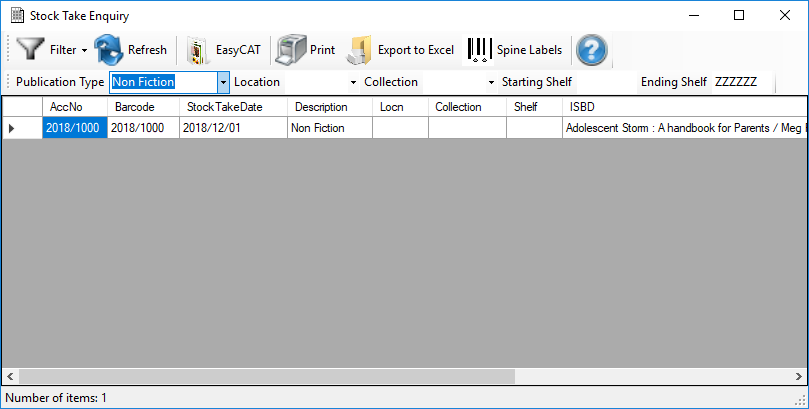
At the end of Stock Taking, you will be able to enquire on the Stock Take. Select the Stock Take Enquiry option under the Routines, Stock menu option.
This screen will show you the stock date of the stock in the system. You can filter the items on Publication Type, Location, Collection and Shelf Range using a starting Shelf and an Ending Shelf. There is also a filter button that will select:
- All Stock Items – whether taken stock of or not
Stock
- Taken Items – which have been scanned during the Stock Take
- Outstanding Items – those items that are missing
Reports can also be printed from the menu options under Reports, Stock Reports, Stock Take Reports.
The system will print all the items that were not scanned during stock take. If the date is old i.e. not during your current Stock Date, then you can assume that that item was missing during Stock Take. If there is any reason for an item not being found on the shelves eg: being lost, stolen, kept in the store room etc, it will tell you that the stock was lost, stolen, kept in store room etc. Papyrus will locate the status according to your Stock Status settings.